

Once you've mastered stitching your designs on Aida cloth you're ready to branch out into the very exciting world of waste canvas! What is waste canvas, you ask? It's a temporary grid which allows you to cross-stitch on anything. Yup, I said ANYTHING. Gone are the days when you are limited to only hanging your cross-stitch on the walls!
Working with waste canvas is really easy once you get the hang of it. Before you know it you'll be stitching yourself t-shirts by the dozen. That being said, it does take a little getting used to and we don't recommend it for your first cross-stitching project. But if you've tackled a couple of stitching projects already and want to move on to something else, then waste canvas is for you!
What you'll need:
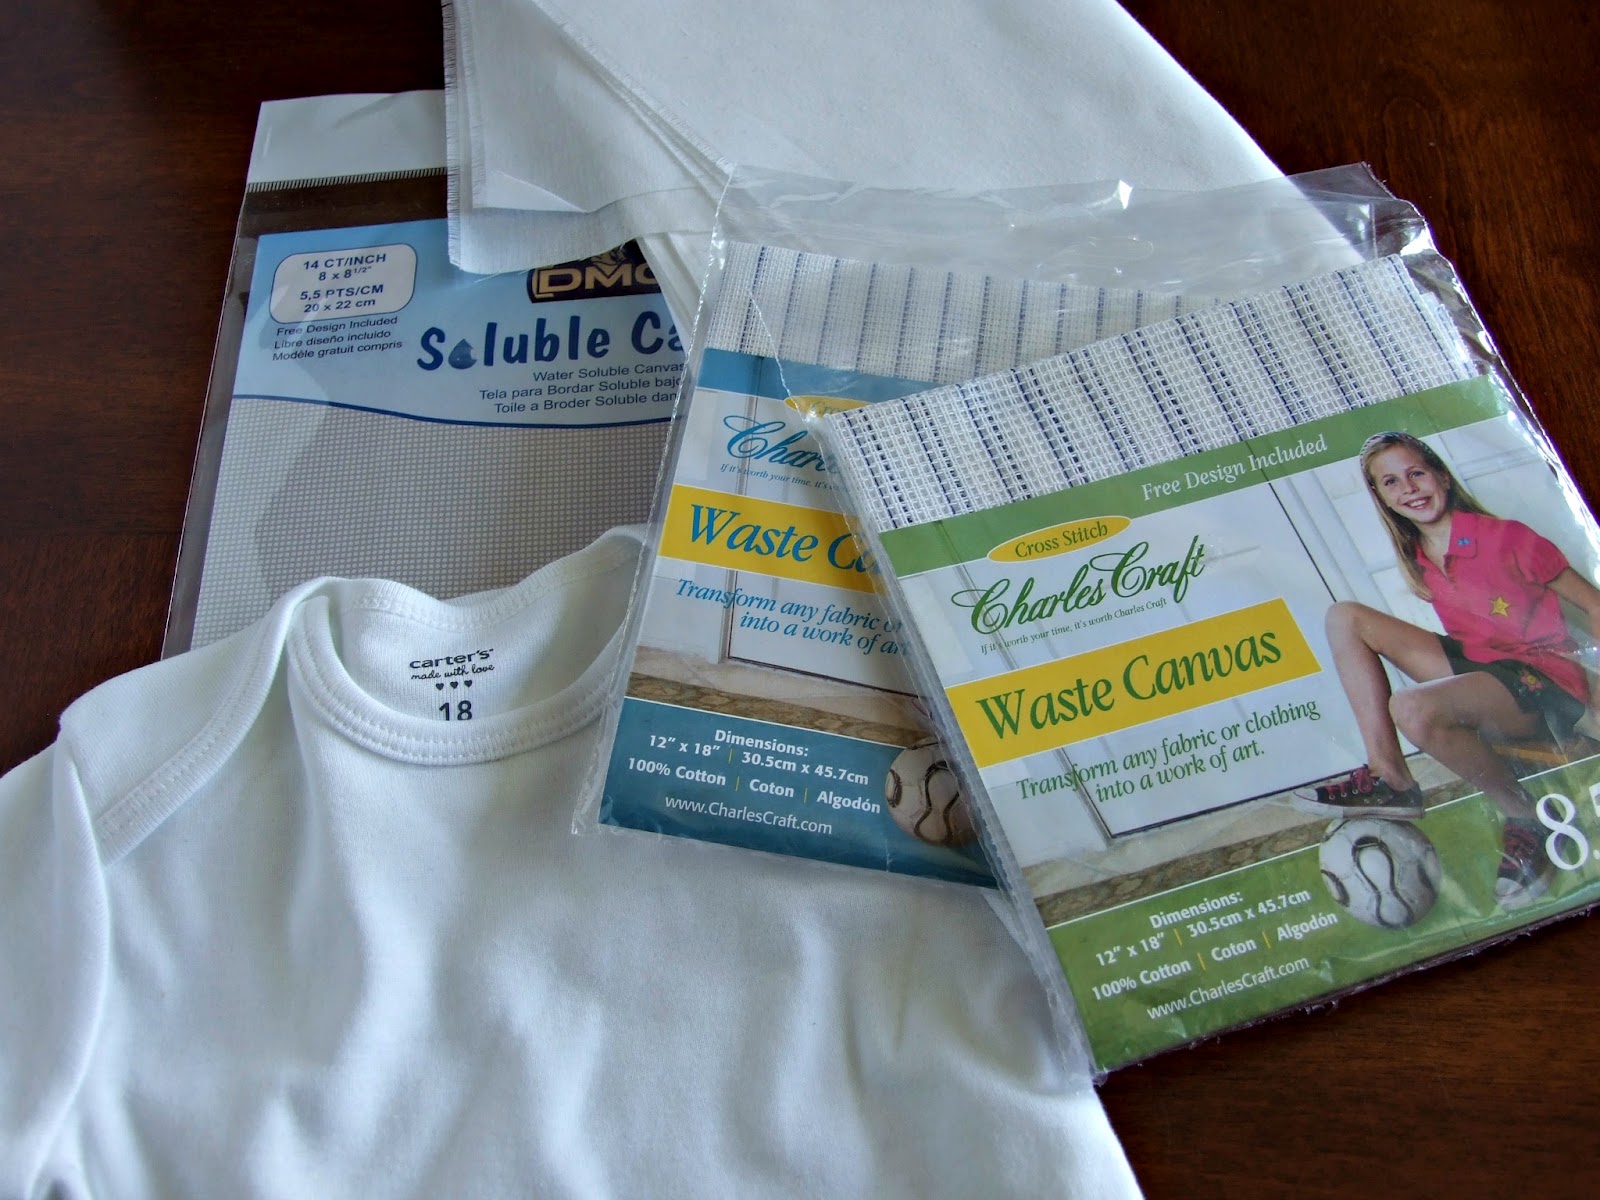
- something to stitch on - today we're working on a blank baby onesie. We're always on the look-out for blank items to stitch on. Micheal's Arts and Craft stores have a great selection of different coloured blank t-shirts for kids and adults, but blank baby items are trickier to find. I've had luck finding blank white baby onesies at Bonnie Togs stores (in Canada). There are online sources as well, but I've never used any of them and can't speak for their quality. Waste canvas allows you to stitch on anything your little heart desires, but we do recommend that if you'll be washing the item frequently that you keep your fibres as consistent as you can. We like stitching on cotton because embroidery floss is also made of cotton and sometimes laundering different fibers together is a recipe for disaster. We've never had a problem with t-shirts which contain a little bit of spandex or rayon, but we do recommend that you try to find a t-shirt which has as high a cotton content as possible. While I have seen some lovely stitching on silk, remember that more delicate fabrics don't always hold up to the constant piercing of your needle - the sturdiness of cotton - be it a t-shirt, denim, or a heavy twill - works well for stitching.
- waste canvas - it's easily available in two counts - 14 and 8.5 - we use Charles Craft brand waste canvas which we get at Michael's Arts and Craft stores - it's in the same aisle as the embroidery floss and Aida cloth. 14 count is the size you're more than likely used to working with - today however we're going to be using 8.5 - the stitches will be almost twice as big as 14 count - not only does that make it a little easier for the first-timer to see, but it makes one singular Pixel Person more significant in scale - and, let's be frank, super cute! DMC has also just come out with water soluable canvas which is available in 14 count. It's considerably more expensive than the traditional waste canvas and comes in smaller pieces. We haven't tried it yet and it works a little bit differently, so for the purposes of this tutorial we're going to stick to the regular ol' waste canvas.
- sew-in interfacing/stablizer - if you're stitching on anything which has even the littlest bit of stretch - like a t-shirt - you MUST use interfacing. Interfacing is a non-stretchy fabric which we use to stablize the stretchy fabric of the t-shirt enough so that it can be stitched on. Do you have a shirt with embroidery on it already? Turn it inside out and you'll notice that there's white fabric-y stuff beneath the stitching - that's interfacing - almost any stretchy or delicate fabric which has been embroidered, whether by machine or by hand, will have used interfacing. Your stitching will be all wonky and funny-looking if you don't use interfacing to back your stitches. You can purchase sew-in interfacing at any fabric store and even sometimes at Walmart in the crafting section. It usually really inexpensive. I buy great big chunks of it for only a few dollars a meter. I like a nice medium-weight interfacing. There are several different types of interfacing including some which you can iron on - you don't need to spend the extra money for the iron-on or self-stick kinds because you're going to be doing lots of stitching which will hold it in place.
- straight pins
- a sharp embroidery needle - Sharp?? you ask questioningly. Yes, sharp. Normally we use blunt tapestry needles for cross-stitch, but that's because the holes on even-weave canvas already exist. When you're stitching through something that doesn't have pre-made holes you're gonna want that sharp needle. Try to find one which passes through the smallest holes in your waste canvas without stretching them out of shape too much - trust us, this will help keep your stitches neat and tidy.
- an embroidery hoop large enough to contain your entire design. Not only is it nice not to have to move your hoop six times while you stitch, but if you hoop overtop of finished stitches you risk warping your waste canvas and throwing your stitches out of line.
- a pattern - today we're using Batgirl from our Batman & Friends pattern. For your first time using waste canvas we recommend a smaller scale project - while something big like our Eleven Doctors pattern would be amazing on a t-shirt (we've seen it done and it's kick-ass!) if you've never used waste canvas before then smaller is better.
- embroidery floss in the recommended colours. Don't use cheap floss - now is not the time to break out the floss you bought at the dollar store - if you're stitching on something which will be laundered use a reputable brand of floss which is colour-safe (it'll say so on the label) - it would be awful to invest all that time in stitching only to have the colours bleed and ruin everything the first time you wash it. We use DMC brand floss. It is wonderful and has never bled on us.
Alright, Let's Get Started!
If you're stitching something which will be laundered make certain you also wash it before stitching. While most garments are pre-shrunk there's no guarantee that yours is - and if it shrinks after you've stitched it the garment will be ruined. Plus you want to make certain that any excess dye has been washed out of the fabric before you stitch on it - otherwise the dye will discolour your stitches and that's not cool. It's quite common for manufacturers to over-dye their garments so make certain that the wash water runs clear before you stitch on your fabric!! It might take more than one wash to accomplish this. Really you should always wash a new garment before wearing anyway - I used to work in fashion retail and you wouldn't believe what sort of chemicals they dose your clothing with - especially if it comes from overseas - it's often covered in pesticides and other nasty things. Trust me.
Iron your freshly laundered item - if not the entire thing then at least the area you'll be stitching. Wrinkles = bad. You wouldn't want to stitch over one and make it permanent!
 |
| cut your waste canvas and interfacing the same size |
Cut your waste canvas slightly larger than your design area. If you're stitching one of our charts, the pattern indicates the size of the design on the information page. Keep in mind that those measurements are for designs stitched at 14 count. If you are using 8.5 count or only part of a design you will have to do a little mathematics to determine the size of the stitching area. Let me show you how that works: I counted and Batgirl is exactly 36 stitches high and 12 stitches wide. On 14 count she would be 2.57" x 0.85" (36 ÷ 14 = 2.57; 12 ÷ 14 = 0.85). On the 8.5 count canvas we're using today Batgirl is 4.23"x 1.41" (36 ÷ 8.5 = 4.23; 12 ÷ 8.5 = 1.41). You'll want to cut your waste canvas an extra couple of inches larger all around than your design area and then cut a piece of interfacing the same size.
 |
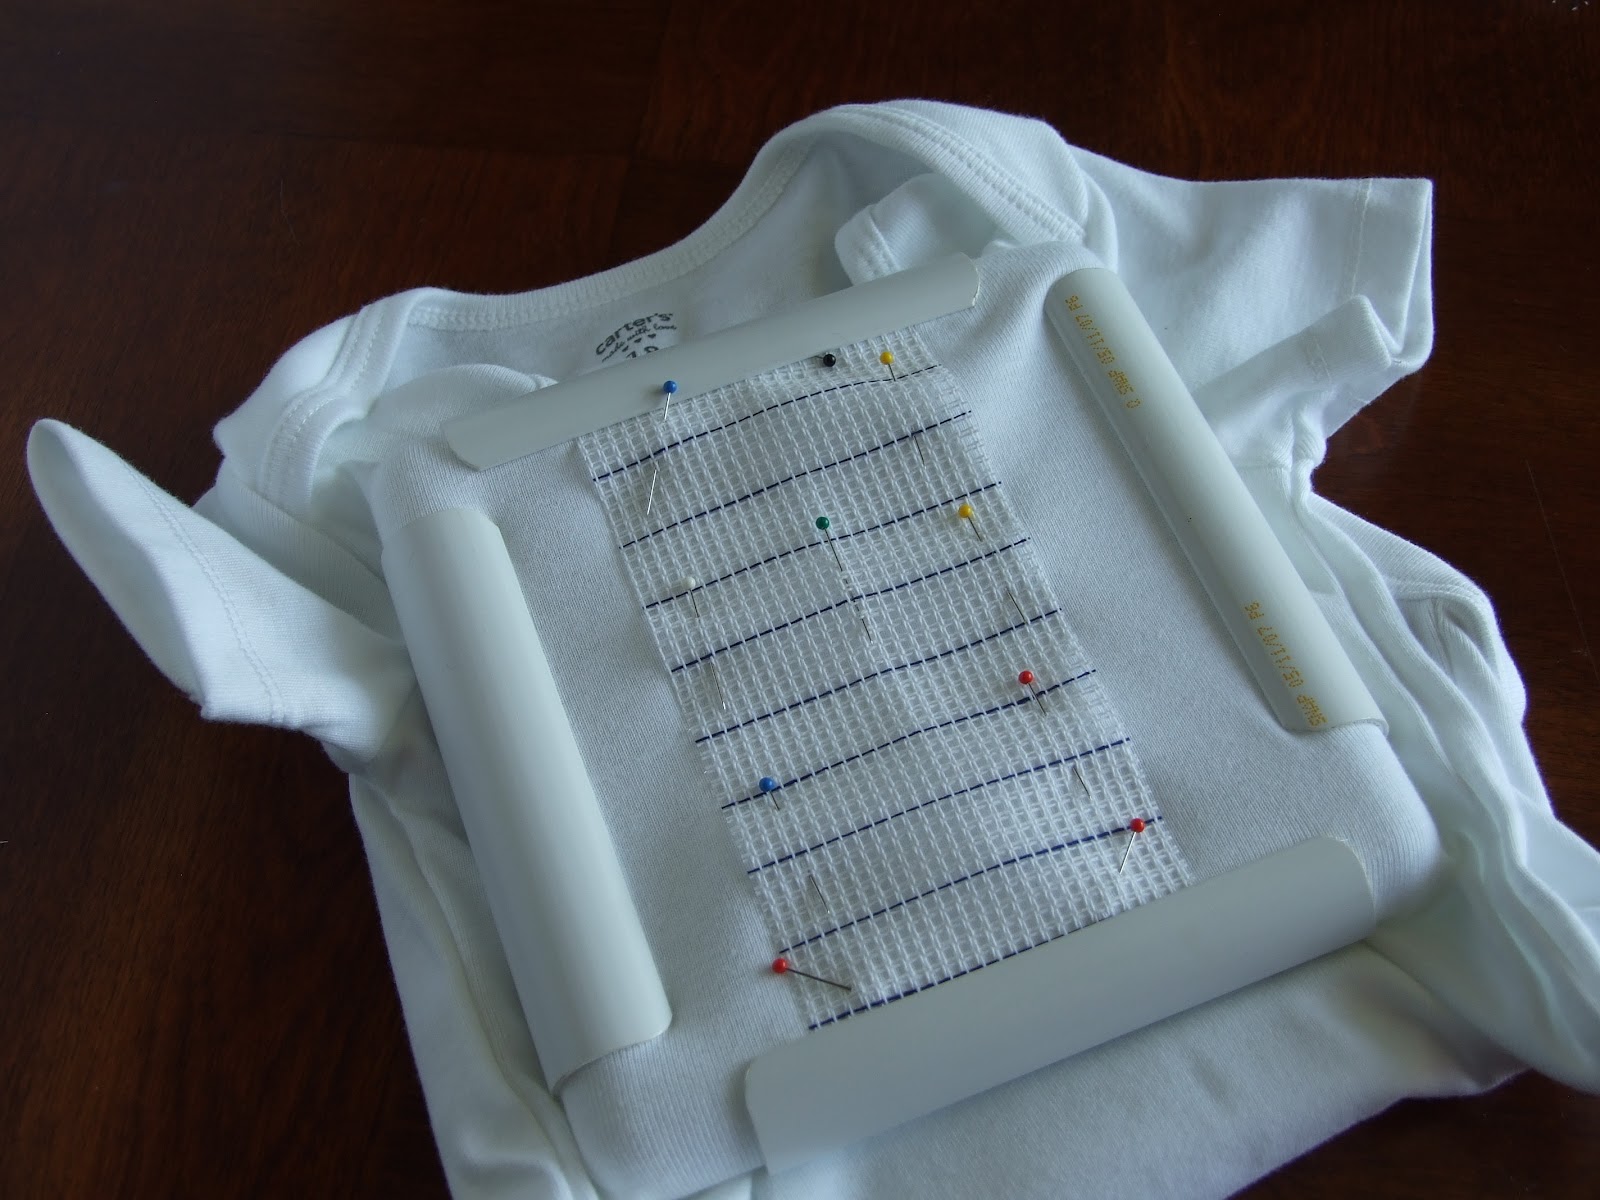
| The green-headed pin marks the centre of my waste canvas |
Honestly the hardest part of stitching with waste canvas is getting it centered on to your t-shirt. Mark the centre of your cut piece waste canvas just as you would if you were working on Aida or linen. Deciding where to place your motif on your t-shirt is a matter of personal preference. I tend to just eyeball it, but you should probably measure the width of your t-shirt to determine the centre point. Or, if you like a quick fix you can just fold it in half and find the centre that way!
When we tack our waste canvas to our t-shirt we want to make a little sandwich of the layers which goes like this:
waste canvas
top layer of t-shirt
interfacing
Remember, you're only stitching through the waste canvas, the top layer of your tee, and the interfacing... NOT the back layer of the tee too... you do need to be able to wear it!
Try to do your best to keep your waste canvas/interfacing lined up properly - both centered on your tee, but also kept straight on the hoizontal as well - otherwise your stitched design will be crooked! Like I said, this is definitely the most difficult part of working with waste canvas. I often have to re-pin my sandwiched layers several times before I get it perfectly straight, but then I'm a perfectionist.

Once you're happy with your placement you'll want to temporarily baste all the layers together so they don't slip while you stitch. If I'm working on a small scale project like today's stitching, I'll be lazy and just leave my pin basting in - I make sure I use a lot of pins! If you're stitching something larger though you'll want to baste-stitch the layers together using sewing thread in a contrasting colour like this:

You'll remove those basting stitches before you complete your tee.
Hoop your stitching area, being sure to keep the waste canvas grid as square as possible. It is easy to pull it a little wonky - and wonky waste canvas = wonky stitches. You'll want to remember that your inside hoop goes inside the tee shirt, not at the back of it - you don't, don't, don't want to stitch through both the front and the back of the t-shirt!!
I know this seems like a lot of work, but proper preparation makes everything so much nicer.
Okay.... time to stitch!
Let's take a minute to understand the temporary grid that is waste canvas. If you're accustomed to stitching on Aida cloth or linen at first glance there seems to be a LOT going on with the weave of waste canvas. Panic not. It's actually quite simple.
 |
| Your needle will go through the smallest size holes in the grid |
 |
| Each stitch goes from one of the smallest holes to the next |
 |
| And then back again! |
 |
| The dark blue thread woven in to the waste canvas mark every five rows |
Take your time and be mindful of how you lay each stitch - even though you've tacked the waste canvas down it can go a little misshappen from being handled so much - try to keep the horizontal and verticle lines of the canvas as straight as possible so your stitches are also as straight as possible. Motifs stitched with waste canvas can look messy if your stitches are placed inaccurately. When two or more stitches share the same hole in the canvas make certain your needle enters the fabric in exactly the same place each time.
Keep the strand of your working floss relatively short - the more a length of floss is passed through fabric the more it can dull and fray. In even-weave fabric like Aida, the hole is already made and so the floss can pass through with less friction, but when you're stitching on solid fabric there is more stress on the floss as you pull it through - if keep your floss to a manageable length your stitches will look nicer.
I like using three strands of floss when I stitch with waste canvas (I usually just use two when I stitch on Aida). On 14 count this makes the stitches nice and full and almost completely covers the colour of the t-shirt beneath. At 8.5 (like we're using here) the stitches are a little less full so that you can see the white tee beneath - personally I like it that way since it's sort of cool to see each individual stitch at such a large scale, but if you wanted fatter stitches you could certainly use 4 strands of floss. For backstitching I like to use 2 strands so you can see those details from far away.
Really from here on in it's just like normal cross-stitching.
 |
| Progress! |
Once you've completed all your stitching it's time for the fun part!
 |
| All done! |
Unhoop your stitching and if you've basted your waste canvas down with stitches now is the time for you to remove those. Or if you're me, you just take out all the pins.
Removing the waste canvas is definitely the best part of stitching - there's something very satisfying about it. The waste canvas brand we use recommends dampening the canvas to release the starch which holds it together - normally I don't even have to do that, but of course you can if you like or if the grid is being stubborn. If there's a lot of empty waste canvas around your design you can (carefully!) trim it closer to you stitching - you don't want to trim it too close though - not only does that run the risk of accidentally cutting a stitch, but you'll need a little of the waste canvas to hold on to so you pull the strands free. If you've stitched more than one motif it also sometimes helps to cut the waste canvas inbetween each motif (if there's room) so that you're removing shorter strands instead of great big long ones.

You want to pull each individual strand of the waste canvas out from underneath the stitches you've made as carefully as possible - the best way to do this is to pull out from the side, try not to pull up. I like to start with the shorter strands first - once they've all been removed it's much easier to pull out the longer strands.
Yes, you do actually have to pull each strand out individually - it sounds tedious but I find it really fun. You can use tweezers if you find it helps you grasp each strand - just don't use your good, expensive ones - don't ask me how I know that. If you come across any stubborn strands try wetting your canvas again and waiting a minute - or try pulling it free from the other side. Sometimes the strand breaks - don't panic. Try pulling it free from the other end instead. If that doesn't work you can always trim it really close to your stitching.
 |
| shorter strands first |
 |
| then the longer strands |
 |
| All done!! |
If you like you can also trim the interfacing on the inside of your t-shirt so that it's closer to your design.

The only thing left to do is turn your piece inside out and iron out the hoop marks from the backside. You should try to avoid ironing the front of your stitches - it smushes them down and makes them look messy!
Caring for your finished item:
You'll want to wash garments inside out to protect the front of your stitching. Machine washing should be okay if the fabric you stitched on is safe for that method. We do like washing in cold water as a bit of a fail-safe against any further shrinkage, but that's not strictly necessary.
Skip the dryer - not only is air-drying better for the environment, but it keeps your colours bright and again prevents any further shrinking of your garment!
Avoid washing your garment along with anything which might catch on the stitches - like shirts with sequins, anything with a zipper, or your bras. If you find your stitching has gone a little wonky in the wash you can reshape it while it's wet. Drying your garment flat helps too. We also stay away from hanging any garment which we've stitched on - while your interfacing backing should prevent the stitches from stretching out of shape, the remainder of the garment may do so and that will just look funny. We always fold our stitched pieces for storage.
OMG! What else can I cross-stitch?!
Anything, my darlings, anything. We've stitched t-shirts and sweatshirts. Ballcaps and blue jeans. Skicaps and shoes. Tote bags and messenger bags. Aprons and napkins. Basically if it's thin enough to get your needle through comfortably you can stitch on it!
And if the item you'd like to embellish is too thick, too awkward, or doesn't stand still long enough to stitch on try making an applique using waste canvas and felt. This is one of our favourite methods for baby items and kids shirts because you can remove the applique once they've outgrown the garment and sew it on to another!!
 |
| Stitch on felt, cut it out, and applique it to ANYTHING! |
 |
| A few simple running stitches will attach Boba Fett to any item. |
That's it! Happy stitching!
Oh, and we would like to take this opportune moment to remind you that all of our patterns are for personal use only. You can make all the tees you like for you, your family, and your friends (and we hope you do!), but we ask that you not sell anything made with our patterns. Thanks! J&C
I think I'll be making a lot of felt appliques to put on clothes, bags, etc. Would also be great to add to a gift tag or something on a gift bag. Fun tag that is part of the gift!
ReplyDeleteI Recommend Dr easbnam to everyone for his great work for curing me from Herpes with his Herbs Remedy and today i'm cured i am happy to share the good news and to also let everyone know how great his herbs remedy is with no side effect i am free from the herpes virus with no side effects. kindly reach him out. WhatsApp + 2348106600701 Email: dreasbnamrootandherbal1@gmail.com
DeleteThat is so awesome!! Thank you for the tutorial! Can I ask, where did you get your hoop? I've never seen one like that and it is really neat!
ReplyDeleteThe hoops we use are called Q-Snap frames... I think they were originally developed for quilters, but truthfully they work fantastically for stitchers too - they don't leave bad hoop marks in your fabric the way that wooden hoops do plus they're much easier to get on and off. We buy ours at www.marymaxim.ca
DeleteAwesome, thanks for taking the time to put this together
ReplyDeleteDo you knot the threads when you are cross stitching on clothing? I never knot my threads when doing cross stitch--I just secure the ends of threads under already-stitched threads--but I'm wondering if that will hold on a garment. Thanks for the great tutorial!
ReplyDeleteI don't knot my threads when I'm cross-stitching on a garment - there's no guarantee knots would hold up in the wash anyway... I just secure them really well under already-stitched threads. If it makes you nervous you could always dab a little clear fabric glue on the ends. Truth be told, I've never had a problem with just securing my ends under stitches.
DeleteSweet! Thanks!
ReplyDeleteIf you stitch the waste canvas on felt, do you need interfacing too? Stitching to the felt seems like a good way to do it for my fidgety mind, I'd probably want to move it every so often to a different bag or something!
ReplyDeleteYou don't have to, but you certainly can. I think it depends on the quality of the felt you are using. Better quality felt is thicker and heavier - therefore interfacing probably isn't necessary. Cheap acrylic felt can be a little thin and insignificant - interfacing would give it some needed strength, especially if you thought you might reuse the applique more than once.
DeleteGreat idea to cross stich anything!during summer its nice to wear blank t shirts that is keep you cool and comfortable!
ReplyDeleteThis is so cool! I've never heard of waste canvas, but now I'm itching to try it on something! Thanks for sharing.
ReplyDeleteHi guys, I hope you don't mind but I have linked to this post on my blog http://msstitcher.blogspot.co.uk/2013/02/cross-stitched-t-shirts.html Thank you for the fantastic tutorial
ReplyDeleteLove this. Thank you so much.
ReplyDeleteI have used waste canvas many times but this is the first time I am going to attempt an adult size shirt. I have always used the large holes on the waste canvas as my needle area and crossed over the small holes. I will have to try it as you suggest and see what the difference is. Thinking I will have to use more then 4 strands as I am doing 8.5 and really don't want any of the shirt color coming thru. Thank you for this I learned something new !
ReplyDeletenice design! forest and lakes
ReplyDeleteI am intrigued by the stitching on felt. What type of felt do you use, and how does it hold up in the wash? I've stitched on clothing before, but not a patch and I think that is a good idea.
ReplyDeleteHi Margo!
ReplyDeleteWe recommend using 100% acrylic felt to make patches with. Felt with any wool content in it will continue to shrink and felt further if you wash and dry it and that will warp your stitches really badly. (Trust us, it really sucks when that happens). Luckily, acrylic felt is easy to find and is a lot cheaper than the wool variety. We like the Eco-fil brand that we buy at Michaels Arts and Crafts stores - it comes in a huge rainbow of colours and best of all it's made with recycled materials, which makes us feel pretty darn good!
I've never had any problems laundering patches made with acrylic felt - the edges can pill a little over time, but washing the garment inside out helps to alleviate that problem, as does avoiding drying garments in the dryer. If the felt does pill a little after a while, it's pretty easy just to trim those offending bits off and no one is the wiser.
Happy stitching <3 J.
Thanks for the awesome article and great response to questions. How do you make stitches felt as an applique to stick to clothes?
DeleteI'm not sure what you mean. If the machine had preloaded designs? Or if the designs were all embroidery instead of appliqué eliminating the need for the fabric panels but not necessarily the thread changes?
ReplyDeleteI have the same obsession as you do, and the same machines . I started when I began making things for my baby granddaughter, and haven't stopped since. Thank you for the idea of heat and bond. I haven't used that yet, but will definitely try.
ReplyDeleteYour detailed instructions for this wonderful art are crystal clear and probably make any crafter want to try this! I can't wait, myself, to get to Michaels to buy the waste canvas which I have never noticed…just have to wait for our snow to abate and the roads to clear here in Colorado Springs…;-] Thanks so much!
ReplyDeleteYour detailed instructions for this wonderful art are crystal clear and probably make any crafter want to try this! I can't wait, myself, to get to Michaels to buy the waste canvas which I have never noticed…just have to wait for our snow to abate and the roads to clear here in Colorado Springs…;-] Thanks so much!
ReplyDeleteI'm curious. You teach to use the little holes in the wc for stitching and that the blue grid lines are five spaces apart. Originally I was taught to use the big holes like I would Aida and that the blue grid lines were ten spaces apart. Is there a difference- maybe with the kind of wc you buy? Or, does working in the smaller holes make the wc easier to pull out? Thanks for the tutorial!
ReplyDeleteIt's possible that some brands of waste canvas have the blue lines every 10 spaces rather than every 5, especially if it's for a smaller count of waste canvas (like 18 count).
DeleteI've always been taught to use the small holes to stitch through when using waste canvas. It helps you to keep those stitches close together and tidy. The packaging that my wc came in also illustrates using the smaller holes, so I believe that's the 'official' way. Using the larger holes would still work, but you may not get the proper 'count'.
My kids are part-Ukrainian from their Dad's side. Now that grandchildren are coming, I would like to embroider directly onto the shirt instead of a strip of aida. Any advice re: the material i.e. should it be 100% cotton to make it easier to work with?
ReplyDeleteI recommend stitching on fabric which has as high a cotton content as you can get - especially for kids whose clothes require a lot of washing and who are most comfortable with soft fabric against their skin (aren't we all, though!). A lot of t-shirts and sleepers have a small polyester content to help keep the items from shrinking in the wash and that's okay. If you do choose to stitch on 100% cotton items be sure to prewash them before stitching in case they shrink. Congrats on the grandchildren!
DeleteI am unsure of how you attach your finished felt patches to the intended item. Do you leave a felt lip around the cross stitching and zigzag this down to the item?
ReplyDeleteYears ago I cross stitched on baby bloomers by ironing on a wash-out grid that was the same size as Aida 14 count fabric, I just cross stitched as usual, then washed the bloomers gently and the grid came off. Does anyone sell this any more?
ReplyDeleteI'm about to cross stitch a Precious Moments pattern onto a corner of a satin pillow case, but the pattern I got is big enough to cover the whole case if done using 14 count waste canvas. I'm looking for 20 - 22 ct waste canvas, but no one seems to offer it! Any suggestions? Btw, your tutorial has been written for all to understand! Very well done!!
ReplyDeleteHi Susan,
DeleteI'm so glad that you found the tutorial helpful.
I don't think I've ever seen waste canvas at 20/22 count, unfortunately. I do know for sure that it's available in 18 count. I get mine from Wichelt Imports.
This comment has been removed by a blog administrator.
ReplyDeleteThank you for the tutorial, i learned this technique from my mother, I have linked this tutorial in my post, for those who want to learn the waste canvas technique. I hope you don't mind.
ReplyDeleteI have several articles of clothing with interfacing which is scratchy and irritating after a few ours. I want to cross-stitch some newborn onesies. Any recommendations for interfacing that won't irritate the baby?
ReplyDeleteI have several articles of clothing with interfacing which is scratchy and irritating after a few ours. I want to cross-stitch some newborn onesies. Any recommendations for interfacing that won't irritate the baby?
ReplyDeleteYou are my hero
ReplyDeleteThis comment has been removed by the author.
ReplyDeleteThis comment has been removed by a blog administrator.
ReplyDeleteThis comment has been removed by a blog administrator.
ReplyDeleteThank you so much for this tutorial! I am about to embark on cross-stitching a onesie, and was so excited to see your thorough post! I had a question: could you give a specific rec of interfacing you use? This was the first result: https://www.joann.com/pellon-shir-tailor-fusible-interfacing/940676.html#start=1, and I also see an option for a mid-weight "stabilizer": https://www.joann.com/pellon-sew-in-mediumweight-interfacing/580274.html#start=1 Do either of these look right to you? Thank you, and thanks for the wonderful tutorial!
ReplyDeleteThank you so much! Perfect for my first attempt atvstitching on clothing. I'm having a terrible time with the waste canvas distorting as I stitch, is this normal? Am I doing something wrong?
ReplyDeleteOtherwise, it's coming along grand!
ReplyDeleteI am new at this, What is a waste canvas? where can I get some? what kind of felt would you recommend? I would use this to try and make my own Velcro patches
ReplyDeleteIt is a nice post. It is very helpful for me. Thanks for sharing such a great information.
ReplyDeleteSelf-adhesive patches for clothing
wahoo mostly I liked customised cross zipper jackets and I think this is customised too...BGTW i appreciate this blog really too good
ReplyDeleteThis comment has been removed by the author.
ReplyDeleteThis is really informative blog for students, Private tutor Wellesley keep up the good work.
ReplyDeletePakistan best online clothing store
ReplyDeleteI’m 61 years old. I contracted hpv in 2011′ I has be taking lot treatment for it and embarrassed some months ago the wart stated coming out seriously, I used lot recommendation because there was lot warts around my anus and was so . but today I’m totally happy I got the virus eliminated by using natural treatment from Dr Onokun herbal center after his treatment I got cured. all the warts went away’ seriously believed Dr. Onokun he have the cure for human papillomavirus because he has eliminated hpv been in my body since 2011, Dr. Onokun make it possible for me. Here is Dr. Onokun email: Dronokunherbalcure@gmail.com or page at: https://www.facebook.com/naturaltreatmentcenter1 or WhatsApp him via +1 ( 323 ) 689 3594 and Website: http://Dronokunherbalcure.wordpress.com he is welled capable of curing terrible diseases.
ReplyDeleteOne of the biggest advantages of Embroidery Digitizing is that it eliminates the need for manual labor, reducing the time and cost involved in the embroidery process. Digitized designs can be easily modified and edited, making it easy to make changes and tweaks to the design without starting from scratch. This is especially useful for businesses that need to create large volumes of embroidery designs, as it can save a significant amount of time and money.
ReplyDeleteA Herpes cure That Matters Robinsonbucler @ Gmail com,...................
ReplyDeleteGreat work.
ReplyDeleteall types of embroidery are available atEmbroidery Digitizing Service thanks.
ReplyDeleteGreat article Towel digitizing great.
ReplyDeleteAmazing article
ReplyDeleteI Recommend Dr easbnam to everyone for his great work for curing me from Herpes with his Herbs Remedy and today i'm cured i am happy to share the good news and to also let everyone know how great his herbs remedy is with no side effect i am free from the herpes virus with no side effects. kindly reach him out. WhatsApp + 2348106600701 Email: dreasbnamrootandherbal1@gmail.com
ReplyDeleteExcellent Analysis Vector Tracing
ReplyDeleteI was diagnosed with Idiopathic Pulmonary Fibrosis (IPF) four years ago, and despite prescription medications, my symptoms worsened. Out of desperation, I tried an herbal treatment program from NaturePath Herbal Clinic. Within a few months, my breathing improved, chest tightness eased, and I regained energy and stamina. It’s been life-changing I feel better than I have in years. If you or a loved one is struggling with IPF, I highly recommend their natural approach: www.naturepathherbalclinic.com
ReplyDelete